Painting
Project Description
This project seeks to explore and express the breathtaking beauty of natural landscapes using the versatile medium of painting. Whether you're an experienced artist looking to refine your skills or a novice eager to discover your artistic voice, this project offers an opportunity to connect with nature and create stunning artworks.
Project Objectives:
Skill Development: Participants will enhance their painting skills, focusing on aspects such as color mixing, brushwork techniques, composition, and the portrayal of textures. Workshops and tutorials led by experienced artists will guide participants through each step of the painting process.
Observational Acuity: Through outdoor sketching sessions and plein air painting, participants will sharpen their ability to observe and capture the nuances of natural landscapes. This objective encourages participants to pay attention to light, shadow, atmospheric perspective, and other elements that bring landscapes to life.
Creative Interpretation: While learning techniques is important, participants will also be encouraged to infuse their personal creativity into their artworks. They will learn to translate their emotional responses to landscapes into visual representations, adding depth and authenticity to their paintings.
Nature Connection: This project aims to foster a deeper connection between participants and the environment. By immersing themselves in the act of painting landscapes, participants will develop a greater appreciation for the beauty and intricacies of nature.
Portfolio Building: Over the course of the project, participants will create a series of landscape paintings that showcase their progress and growth as artists. This collection could be used for personal enjoyment, exhibitions, or even potential artistic endeavors.
Materials:
The following materials are recommended for participants in the "Essence of Earth: A Landscape Painting Exploration" project:
Paints: High-quality acrylic, oil, or watercolor paints. Choose a palette of colors that includes a range of hues to capture the variety of landscapes.
Brushes: Assortment of brushes in various sizes and shapes. Flat, round, filbert, and fan brushes are common choices.
Canvas or Paper: Stretched canvases or watercolor paper of different sizes. Choose surfaces that suit the chosen medium (acrylic, oil, or watercolor).
Easel: A portable easel for outdoor painting (plein air) and a stable one for studio work.
Palette: A palette for mixing and blending colors. Disposable or reusable palettes are available.
Solvents and Mediums: If using oil paints, appropriate solvents and mediums for thinning and extending paint.
Palette Knives: Useful for mixing paint and creating texture.
Sketching Materials: Pencils, erasers, and sketchbooks for preliminary drawings and outdoor sketches.
Reference Materials: Collect reference photos, sketches, or plein air studies of landscapes for inspiration and guidance.
Water and Containers: If working with acrylics or watercolors, containers for water and cleaning brushes.
Rags or Paper Towels: For cleaning brushes and wiping surfaces.
Varnish (Optional): For protecting and enhancing the finished paintings.
Learning Objectives
Creating Mood and Emotion: Explore how to use color, lighting, and composition to convey different moods and emotions in your landscapes. Practice adjusting your artistic choices to evoke feelings of tranquility, excitement, solitude, or any other emotion you want to communicate.
Atmospheric Perspective: Develop the ability to depict depth and distance by understanding and applying atmospheric perspective. Learn how to adjust color intensity, value contrast, and detail as objects recede into the background, creating a sense of space and depth in your landscape.
Composition: Study various compositional techniques like the rule of thirds, leading lines, and framing to create visually appealing and balanced landscape compositions. Experiment with different arrangements of elements within the scene to lead the viewer's eye and tell a compelling visual story.
Natural Textures: Focus on rendering natural textures found in landscapes, such as foliage, water, rocks, and sky. Develop techniques to capture the intricate details of these textures, using brushwork, layering, and blending to make them appear realistic and tactile.
Understanding Light and Shadow: Gain a solid understanding of how light interacts with the landscape. Study the effects of different lighting conditions (e.g., dawn, dusk, midday) on the landscape's forms, colors, and shadows. Practice accurately depicting the interplay between light and shadow to create a convincing sense of volume and form.
Rubric
Rubrics have become popular with teachers as a means of communicating expectations for an assignment, providing focused feedback on works in progress, and grading final products. A rubric is a document that articulates the expectations for an assignment by listing the criteria, or what counts, and describing levels of quality from excellent to poor.
Element of Art
Space:
An element of art by which positive and negative areas are defined or a sense of depth achieved in a work of art.


Artist: Thomas Kinkade
William Thomas Kinkade III was an American painter of popular realistic, pastoral, and idyllic subjects. He is notable for the mass marketing of his work as printed reproductions and other licensed products via the Thomas Kinkade Company. He characterized himself as "Thomas Kinkade, Painter of Light", a phrase he protected through trademark but one originally attributed to the British master J. M. W. Turner (1775–1851). According to Kinkade's company, 1 in every 20 American homes owns a copy of one of his paintings. Despite wide commercial success throughout his life, Kinkade is generally held in low esteem by art critics; his pastoral paintings have been described as maudlin and overly sentimental.

Techniques
1. Wet-on-Wet
Use for: Soft skies, clouds, misty mountains, water.
How: Apply clean water to the paper, then drop in color while it's still wet for soft, flowing edges.
2. Wet-on-Dry
Use for: Sharp details like trees, rocks, buildings.
How: Paint directly on dry paper for crisp edges and defined shapes.
3. Gradated Wash
Use for: Smooth transitions in sky or distant hills.
How: Load your brush with paint and gradually add water to fade the intensity as you paint downward.
4. Flat Wash
Use for: Clear skies, water bodies, background areas.
How: Paint a uniform layer of color with consistent tone.
5. Dry Brush
Use for: Texture—like tree bark, grass, or rocky surfaces.
How: Use a brush with minimal water and drag it lightly across the paper’s texture.
6. Lifting
Use for: Creating highlights or softening areas.
How: While the paint is still damp, blot with a tissue or lift with a damp brush.
7. Glazing
Use for: Adjusting color, adding depth, layering shadows.
How: Apply transparent washes over dry paint to build up color gradually.
8. Splattering
Use for: Texture in foliage, dirt, or starry skies.
How: Tap or flick the brush to scatter small drops of paint.
9. Salt Texture
Use for: Interesting textures in sky or ground.
How: Sprinkle salt on wet paint—once dry, brush it off to reveal crystal-like textures.
10. Negative Painting
Use for: Defining shapes like leaves, branches, or highlights by painting around them.
How: Leave the subject area untouched and paint the background.
11. Backruns (Cauliflowers)
Use for: Accidental or intentional abstract effects in skies or water.
How: Happens when adding wetter paint to a drying area—control this for effect or avoid if unwanted.
12. Scratching or Sgraffito
Use for: Fine lines like grasses or branches.
How: Scratch into the paper with a knife or stick while the paint is damp.
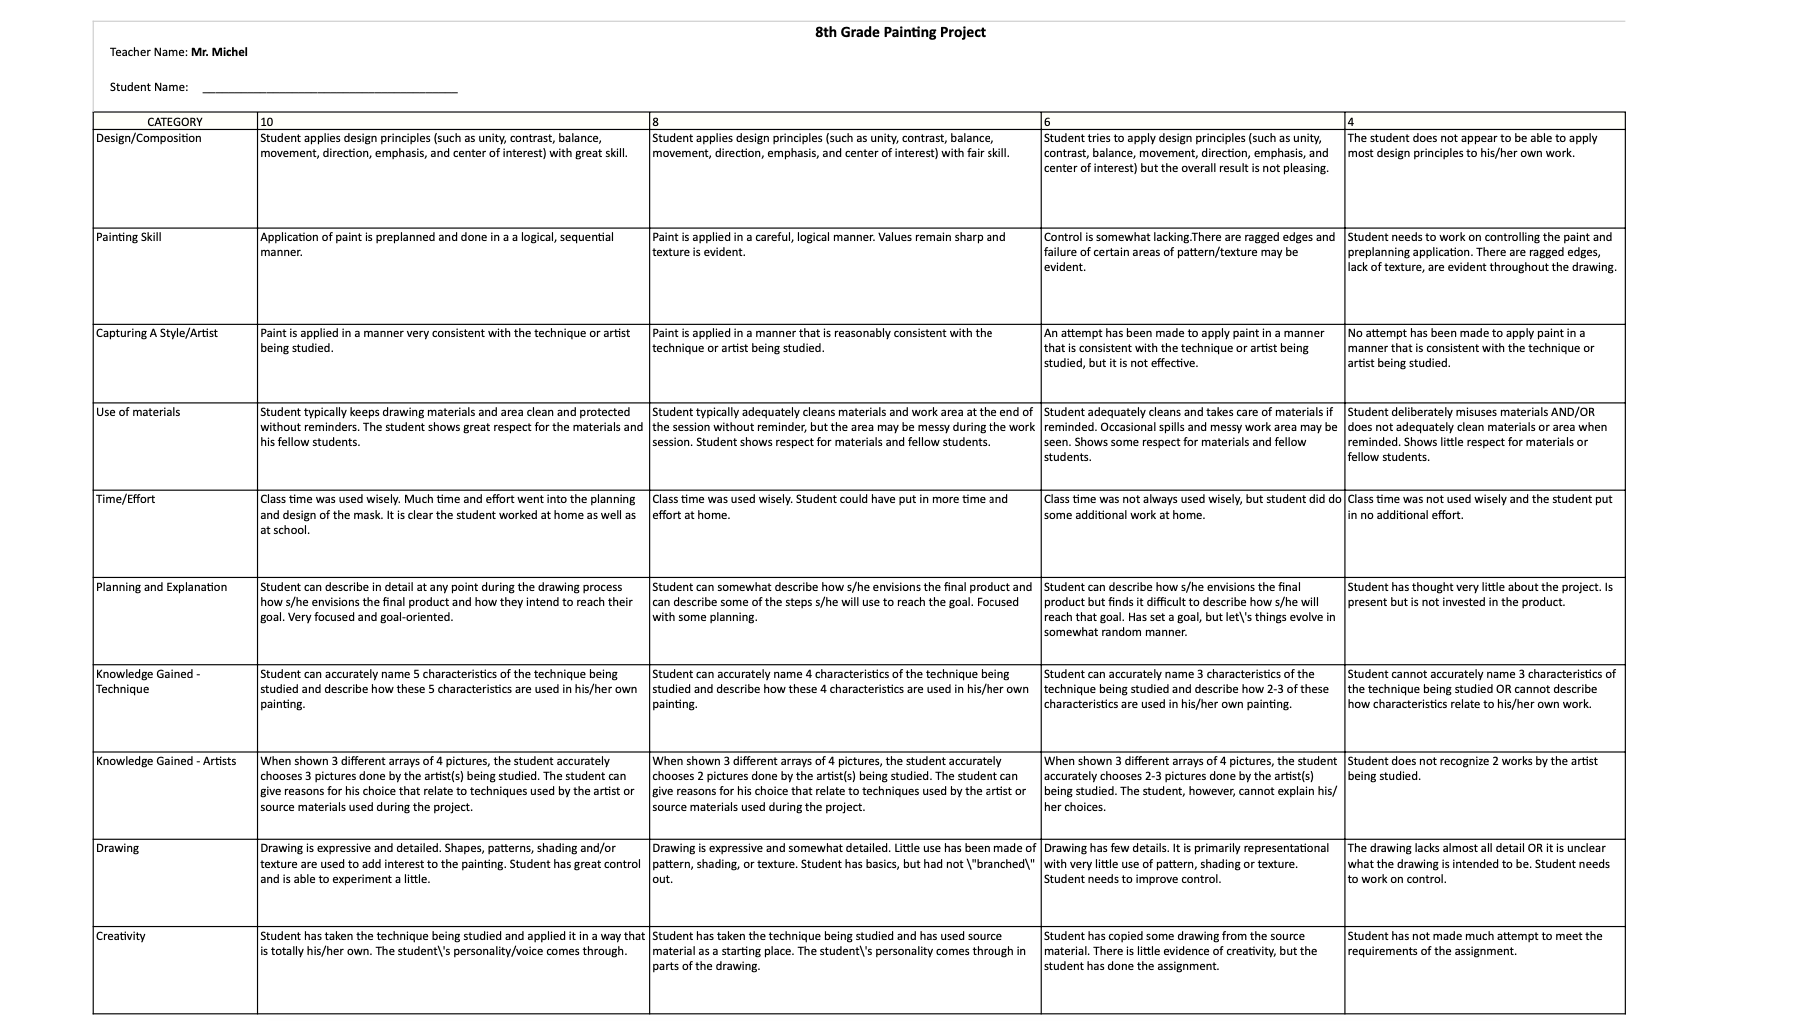
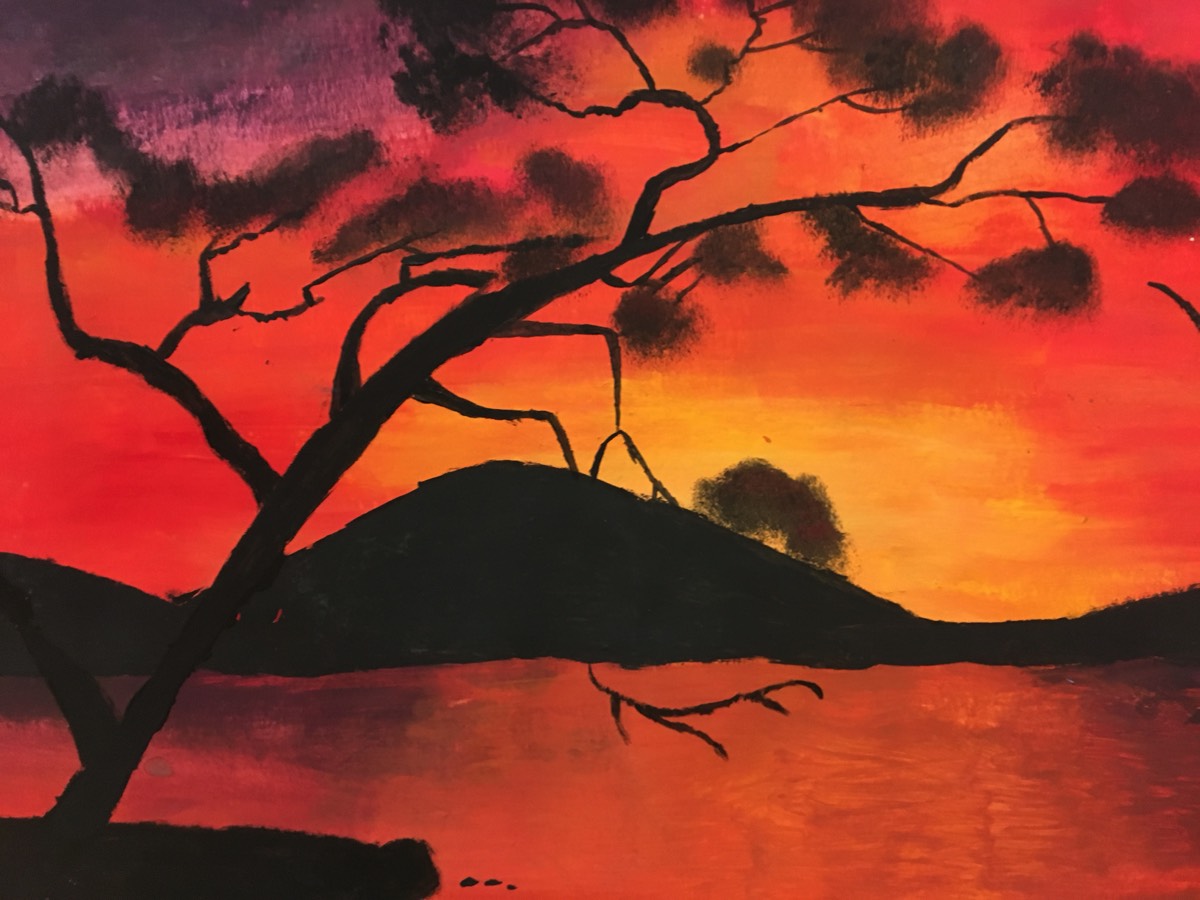
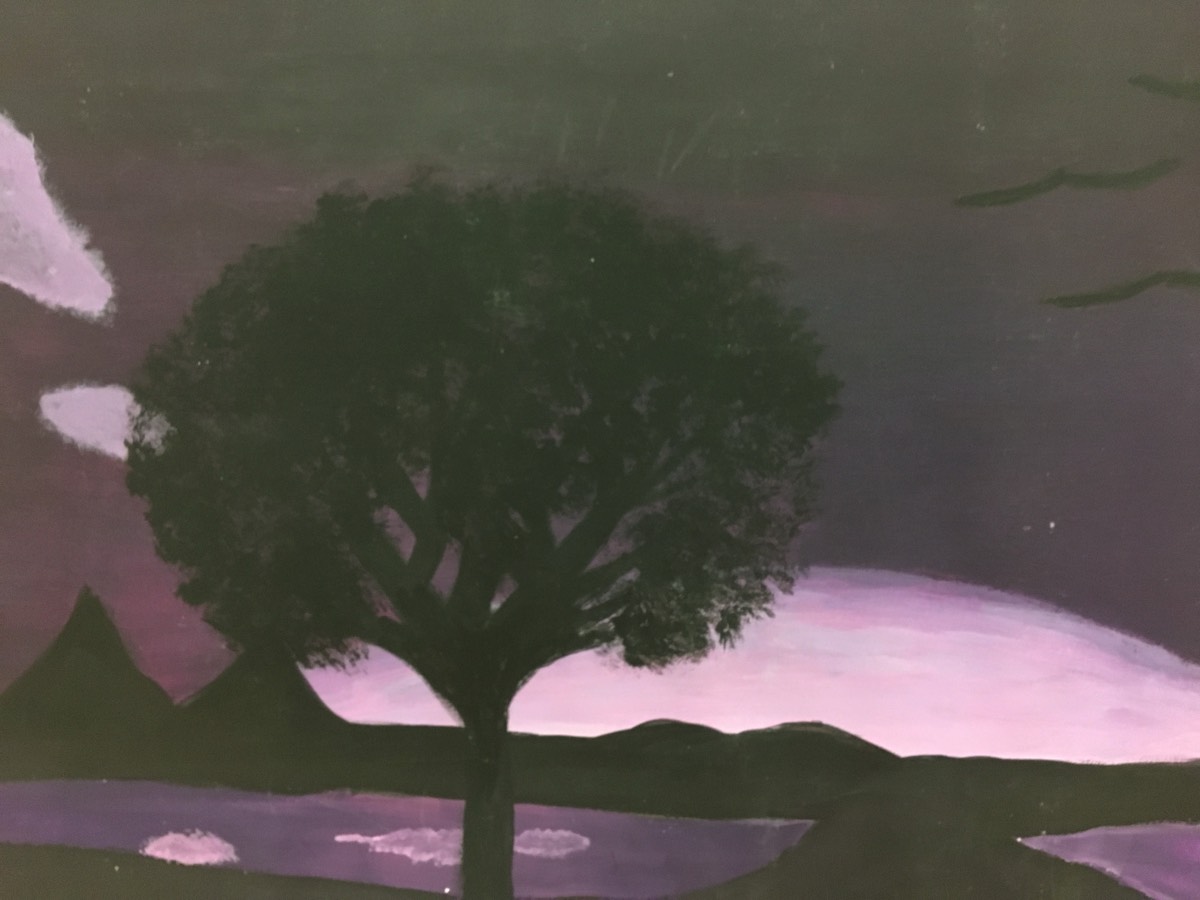
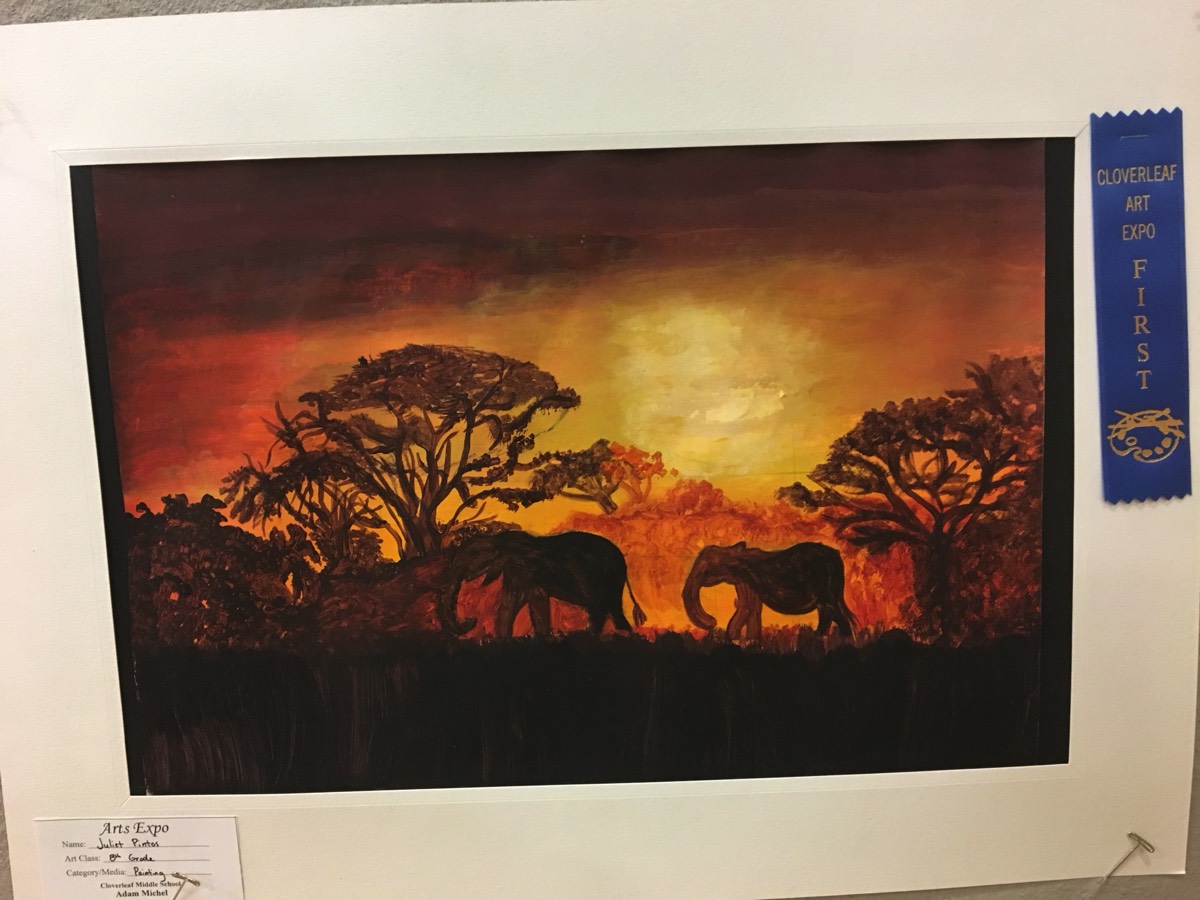
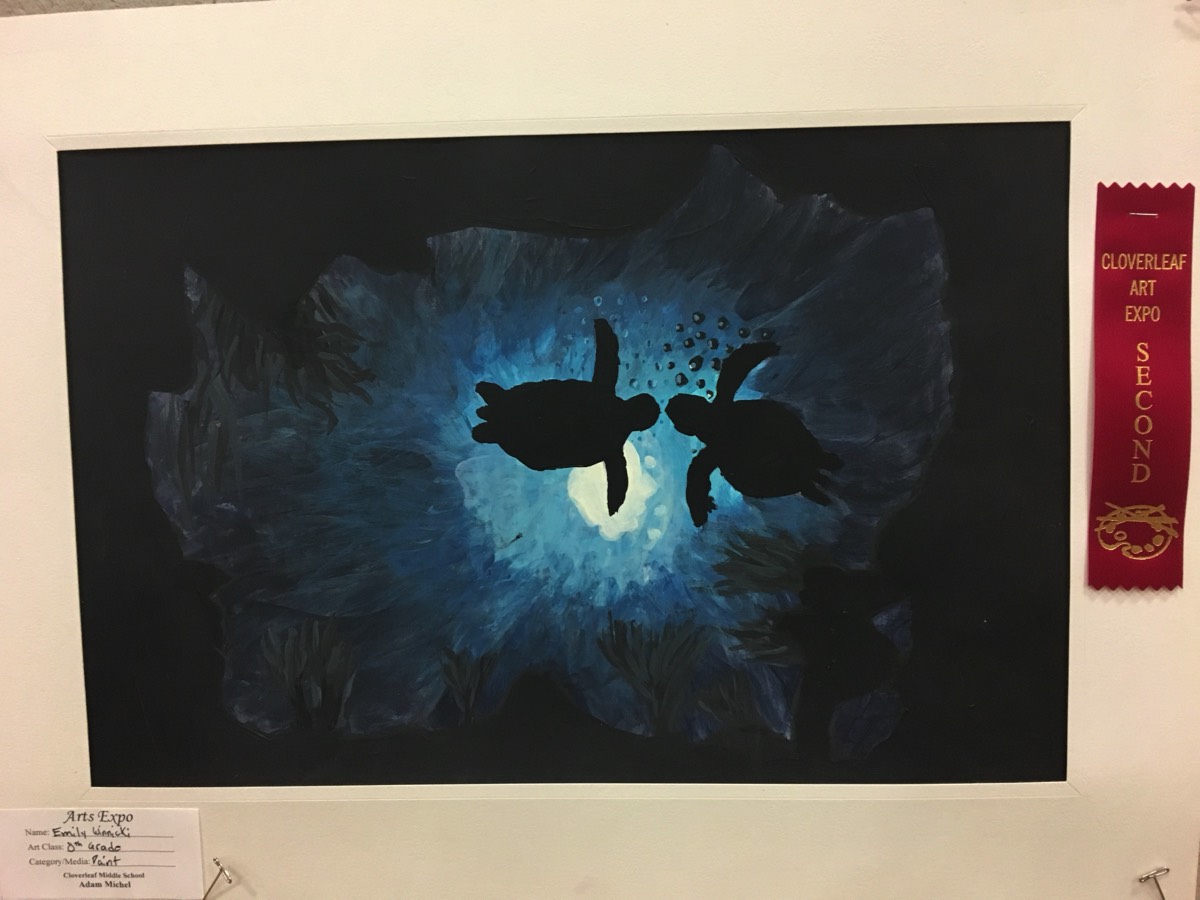
Project Demonstration

Examples

“Creativity takes courage.”
Cloverleaf Middle School
Follow Us
