Project Description
In this art project, you will explore the timeless beauty and expressive potential of pencil as a medium while creating a stunning still life drawing. The subject of your drawing will be a carefully arranged arrangement of pencils, a seemingly ordinary object that, when observed closely, reveals intricate details, textures, and subtleties.
Project Goals:
Master Pencil Techniques: Develop your skills in shading, line work, blending, and texture creation using graphite pencils.
Observational Skills: Enhance your ability to observe and capture the intricacies of everyday objects, paying attention to form, shadow, and reflection.
Creativity and Composition: Experiment with composition, placement, and arrangement to create a visually engaging and harmonious still life setup.
Tonal Range: Explore the full range of values from light to dark, emphasizing the importance of contrast in creating depth and dimension.
Project Steps:
Gather Your Materials: Acquire a variety of graphite pencils (ranging from 2H to 8B), drawing paper, an eraser, a blending tool (e.g., tissue paper, blending stump), and a well-lit workspace.
Select Your Pencils: Carefully choose a selection of pencils with different shapes, sizes, and conditions. Consider including sharpened and unsharpened pencils, as well as ones with eraser ends.
Set Up Your Still Life: Arrange your chosen pencils in an interesting and visually appealing composition. Play with different angles, groupings, and lighting to create a dynamic setup.
Initial Sketch: Begin by lightly sketching the basic outlines of the pencils and their arrangement. Pay attention to proportions and placement.
Value Study: Start adding values to your drawing by shading areas that are in shadow and leaving those exposed to light relatively lighter. Pay close attention to the subtle gradations in value.
Detail Work: Gradually work on the finer details of each pencil, focusing on texture, reflections, and any distinctive markings or imperfections.
Refinement: Continuously refine your drawing, adjusting proportions, refining details, and ensuring that your composition is visually compelling.
Final Touches: Pay extra attention to highlights and shadows to create a three-dimensional effect. Use your eraser to add highlights and refine edges.
Critique and Reflection: Step back from your drawing and critically assess your work. Ask for feedback from peers or your instructor, and make any necessary adjustments.
Materials:
Graphite Pencils: Pencils with a variety of hardness grades (ranging from 2H for light lines to 8B for dark shading) will allow you to achieve a wide range of tones. A set that includes pencils from 2H to 6B is a good starting point.
Drawing Paper: Choose high-quality drawing paper that is suitable for pencil work. A heavier-weight paper (around 90-140 lb or 190-300 gsm) is ideal as it can handle pencil shading and erasing without smudging or tearing.
Eraser: An eraser is essential for corrections and highlights. You may want both a soft kneaded eraser (for gentle removal of graphite) and a harder eraser (for precise erasing of fine lines).
Blending Tools: You can use various blending tools to create smooth transitions between different pencil values. Options include blending stumps, tortillons (paper blending sticks), or even tissue paper.
Drawing Board: A drawing board provides a sturdy surface to work on and helps prevent the paper from bending or creasing. You can use a clipboard, a piece of Masonite, or a dedicated drawing board.
Pencil Sharpener: Keep your pencils sharp for fine detail work. A good quality handheld pencil sharpener or an electric pencil sharpener is recommended.
Light Source: Adequate lighting is crucial for accurate observation and shading. Natural daylight or a good-quality adjustable desk lamp with a daylight or cool white bulb is ideal.
Set-Up Objects: Decide on the objects you want to draw for your still life composition. These could be everyday items like fruit, flowers, books, or, as in your previous request, pencils. Arrange them in a visually interesting way.
Optional materials that can enhance your still life drawing experience:
Fixative Spray: If you want to protect your finished drawing from smudging, you can use a workable fixative spray. Be sure to use it in a well-ventilated area.
Drawing Easel: An easel can make it easier to work on your drawing at an upright angle, which can be more comfortable for some artists.
Masking Tape: To secure your paper to the drawing board and create clean edges.
Reference Materials: If you're working on a specific theme or subject, reference photos or objects related to your still life can be helpful for accuracy.
Learning Objectives
Observational Skills:
Develop the ability to closely observe and analyze the details of a pencil and its various components.
Drawing Techniques:
Practice fundamental drawing techniques such as contour lines, cross-hatching, shading, and blending to accurately represent the pencil.
Proportions and Scale:
Understand the principles of proportion and scale by accurately reproducing the dimensions of the pencil, eraser, and other elements in the composition.
Value and Tone:
Learn to identify and replicate a range of values, from light to dark, to render the three-dimensional form of the pencil and its components.
Composition:
Explore compositional principles to arrange the pencil and other elements in a visually appealing and balanced composition.
Depth and Perspective:
Learn techniques to create the illusion of depth in the drawing.
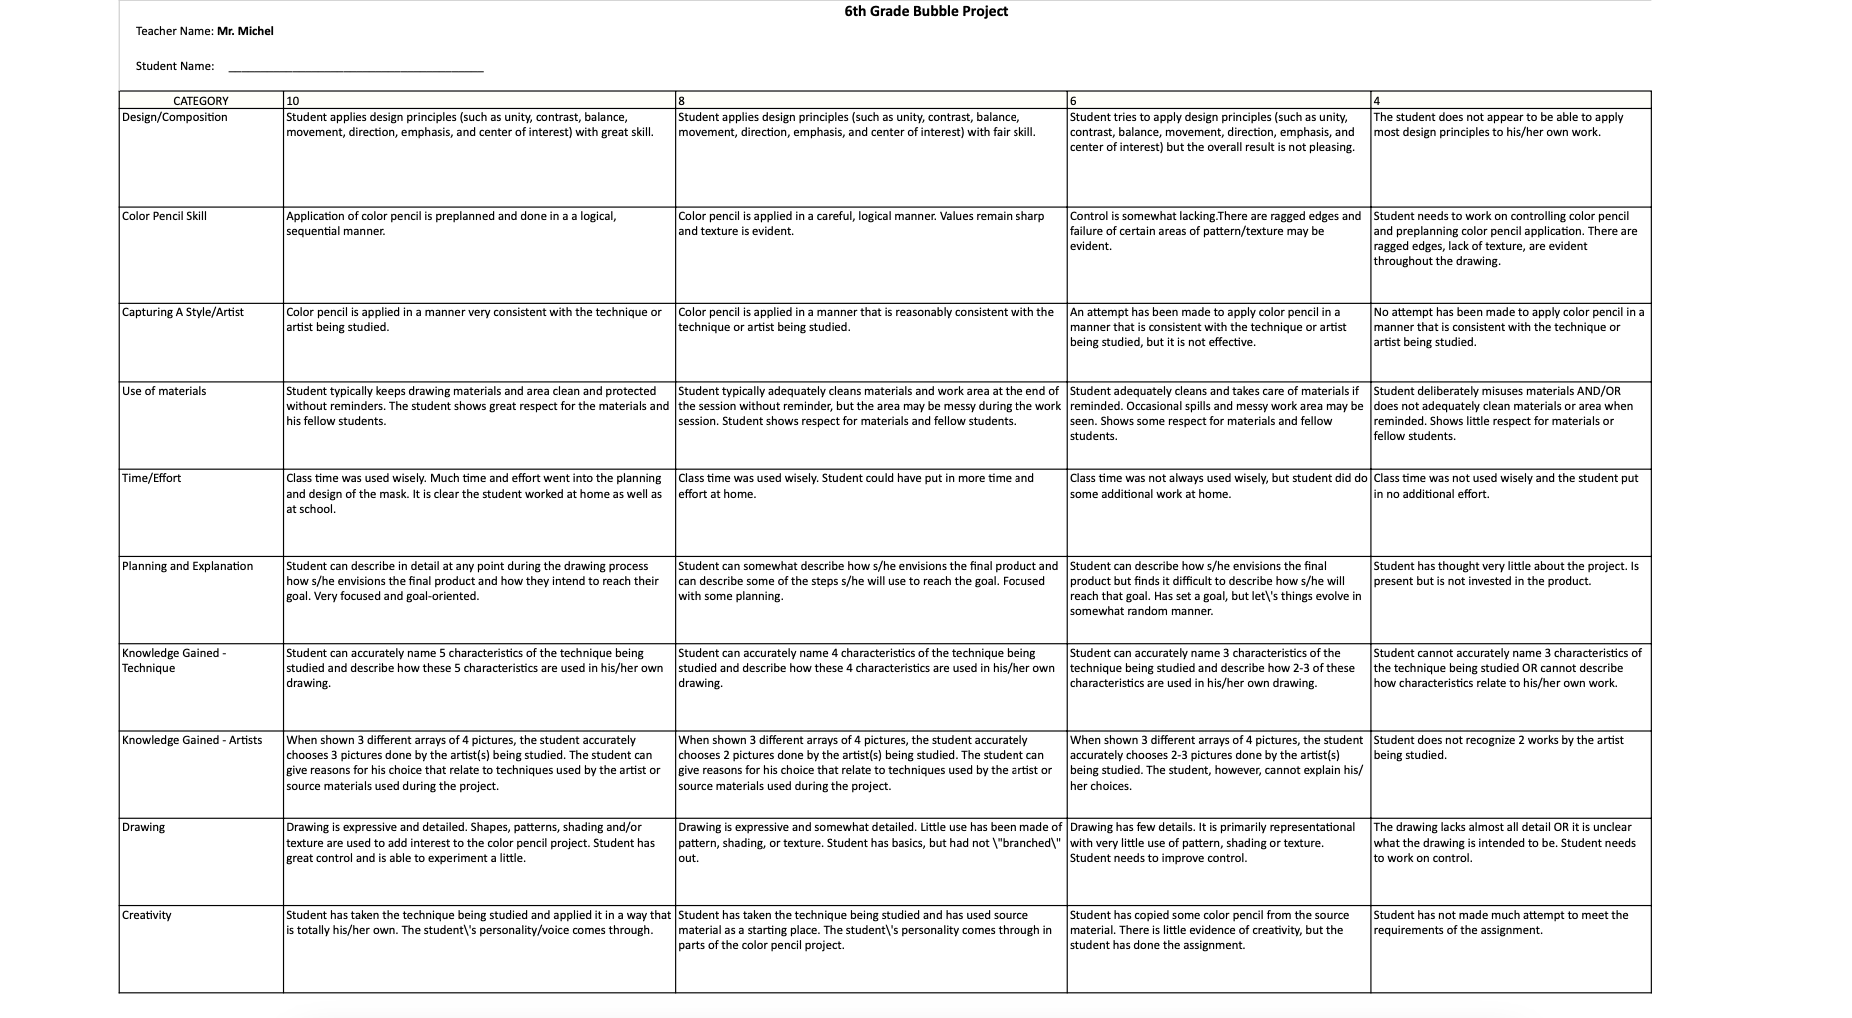
Rubric
Rubrics have become popular with teachers as a means of communicating expectations for an assignment, providing focused feedback on works in progress, and grading final products. A rubric is a document that articulates the expectations for an assignment by listing the criteria, or what counts, and describing levels of quality from excellent to poor.
Element of Art
Color:
An element of art made up of three properties: hue, value, and intensity.
Hue: name of color
Value: hue’s lightness and darkness (a color’s value
changes when white or black is added)
Intensity: quality of brightness and purity (high
intensity= color is strong and bright; low intensity= color is faint and dull)
Artist: The Slow Mo Guys
The Slow Mo Guys is a Streamy Award-winning science and technology entertainment web series created by Gavin Free, starring himself and Daniel Charles "Dan" Gruchy and produced by Rooster Teeth Productions. It has been described as the biggest channel for slow motion videos on YouTube. The series consists of a wide variety of things filmed in extreme slow motion using a range of Vision Research Phantom high-speed cameras, capable of shooting over 343,000 frames per second. The series premiered on 3 November 2010. As of April 2017, their YouTube channel has over 9 million subscribers and over one billion video views.
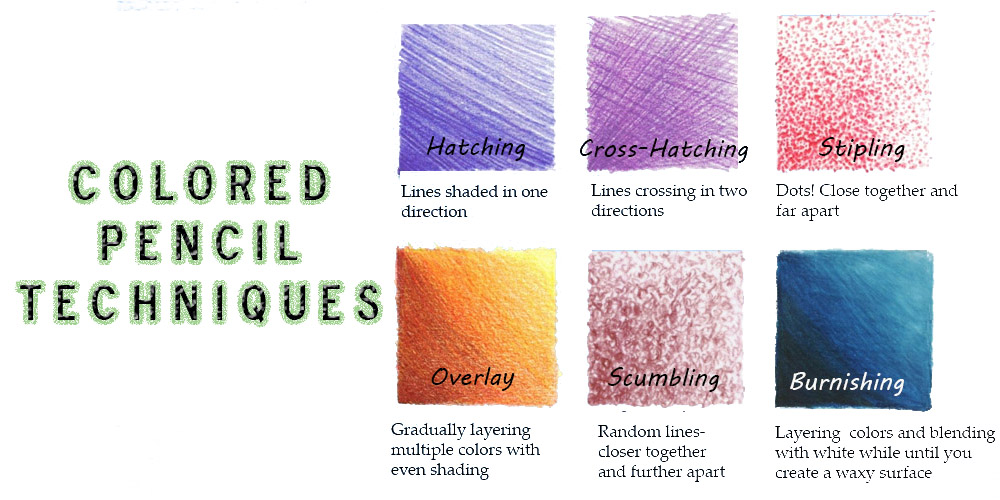
Techniques
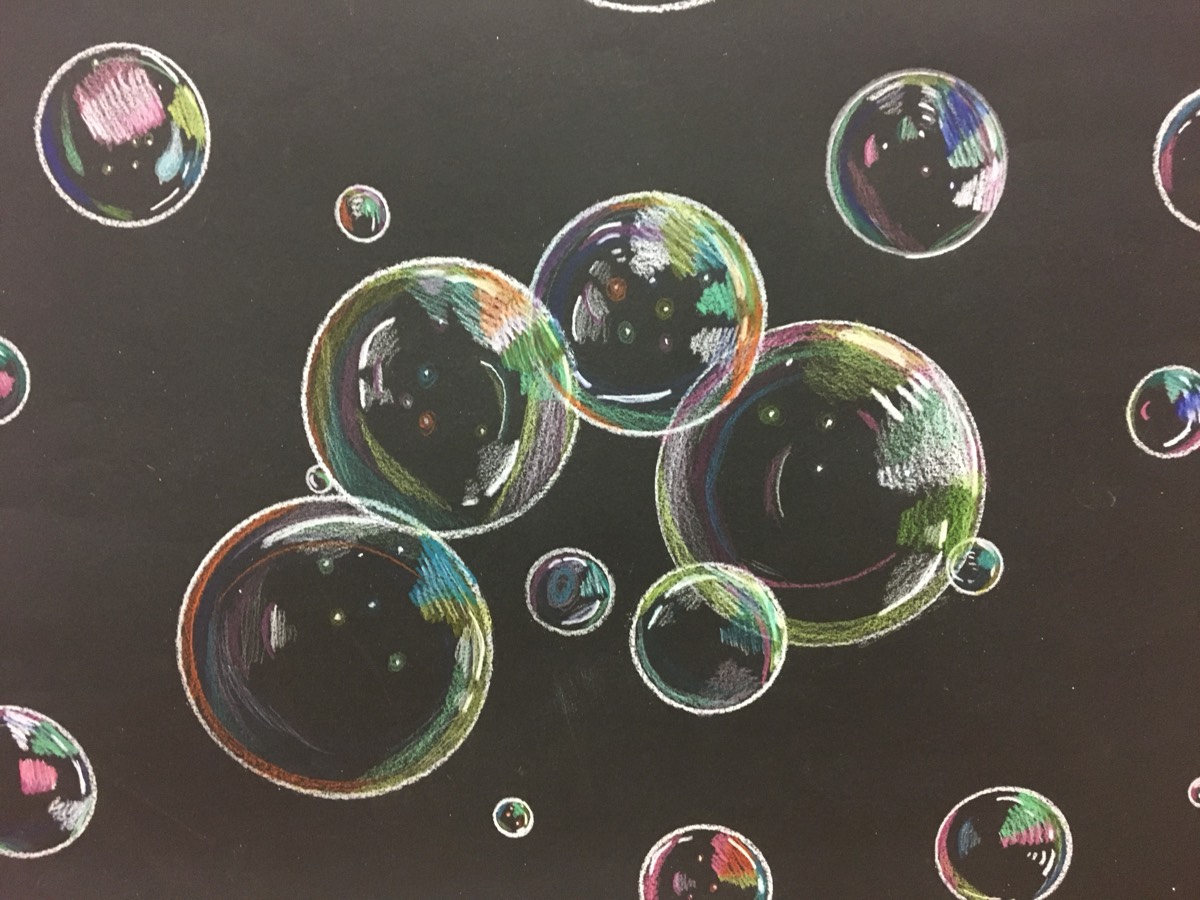
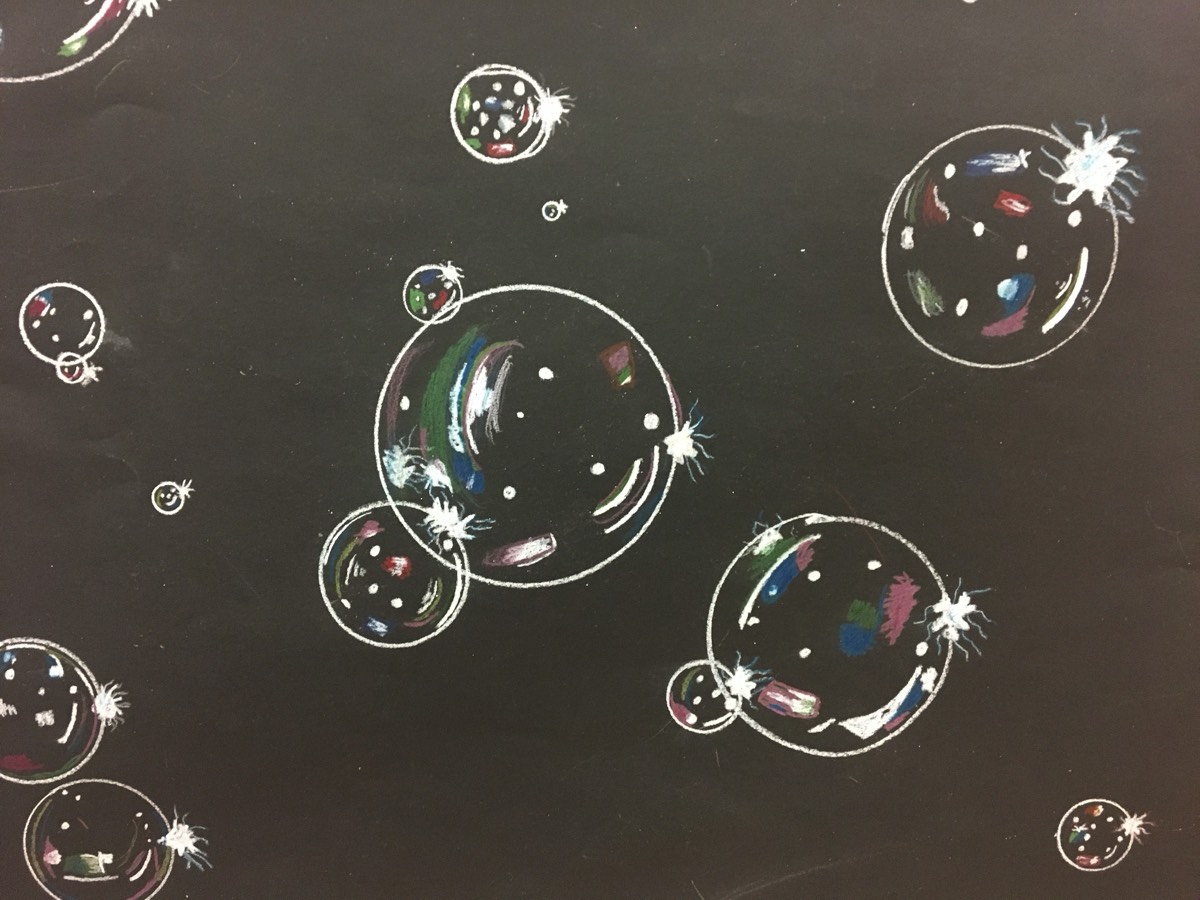
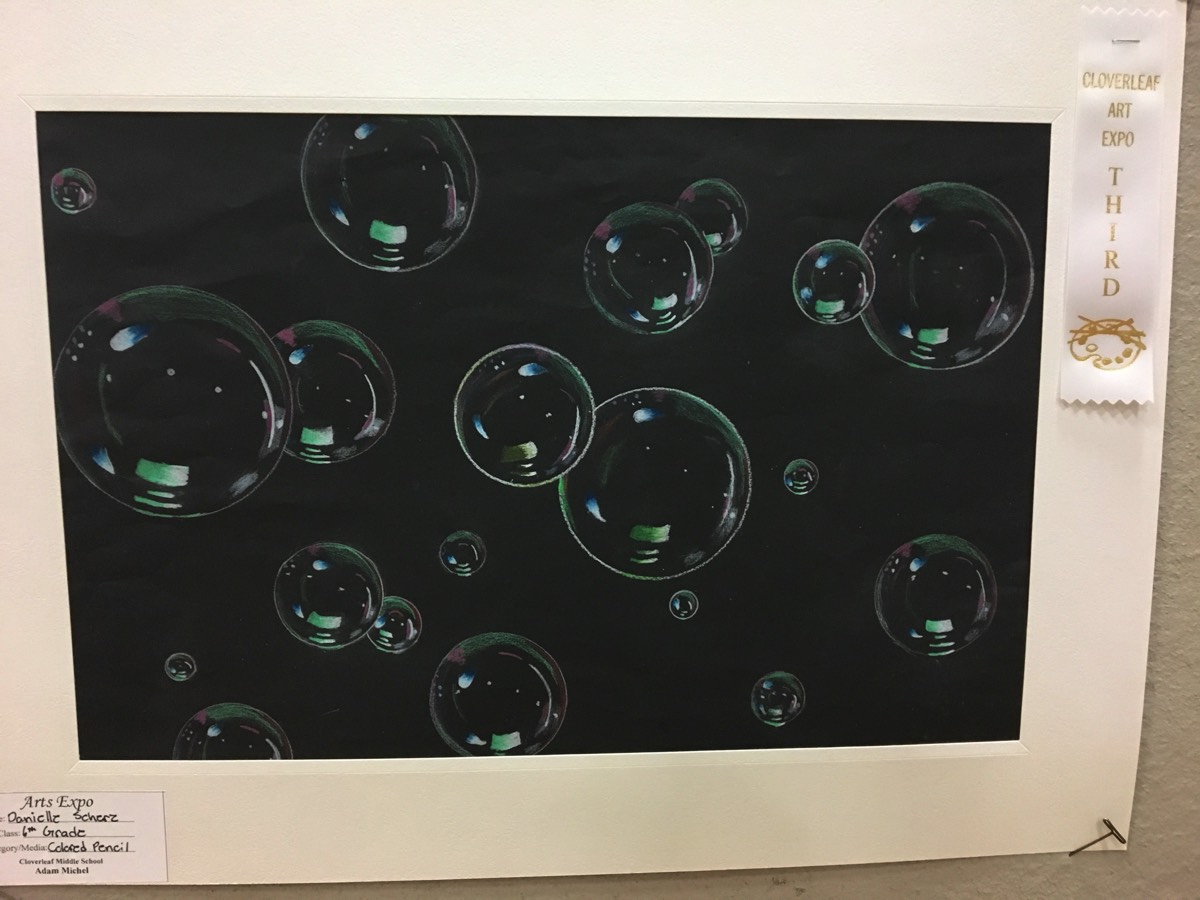
Project Demonstrations
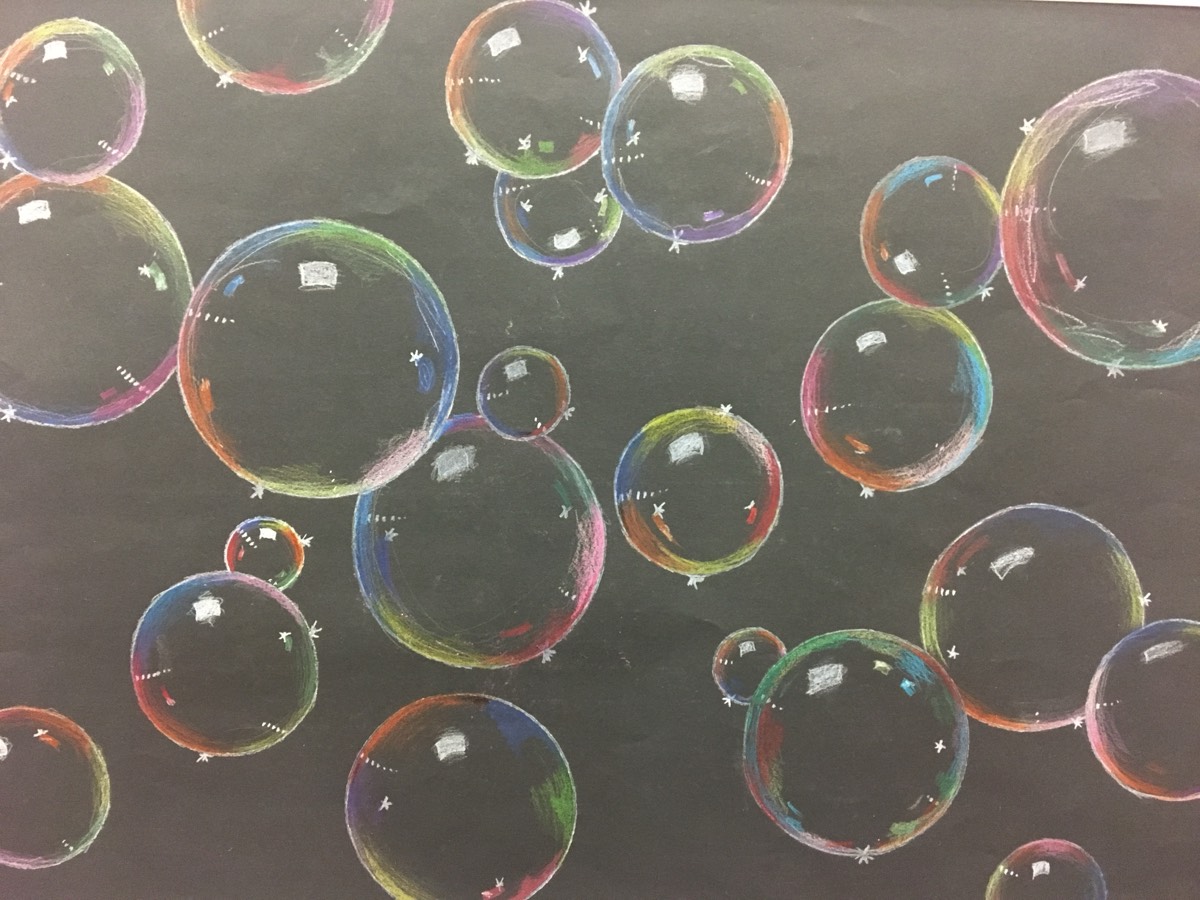
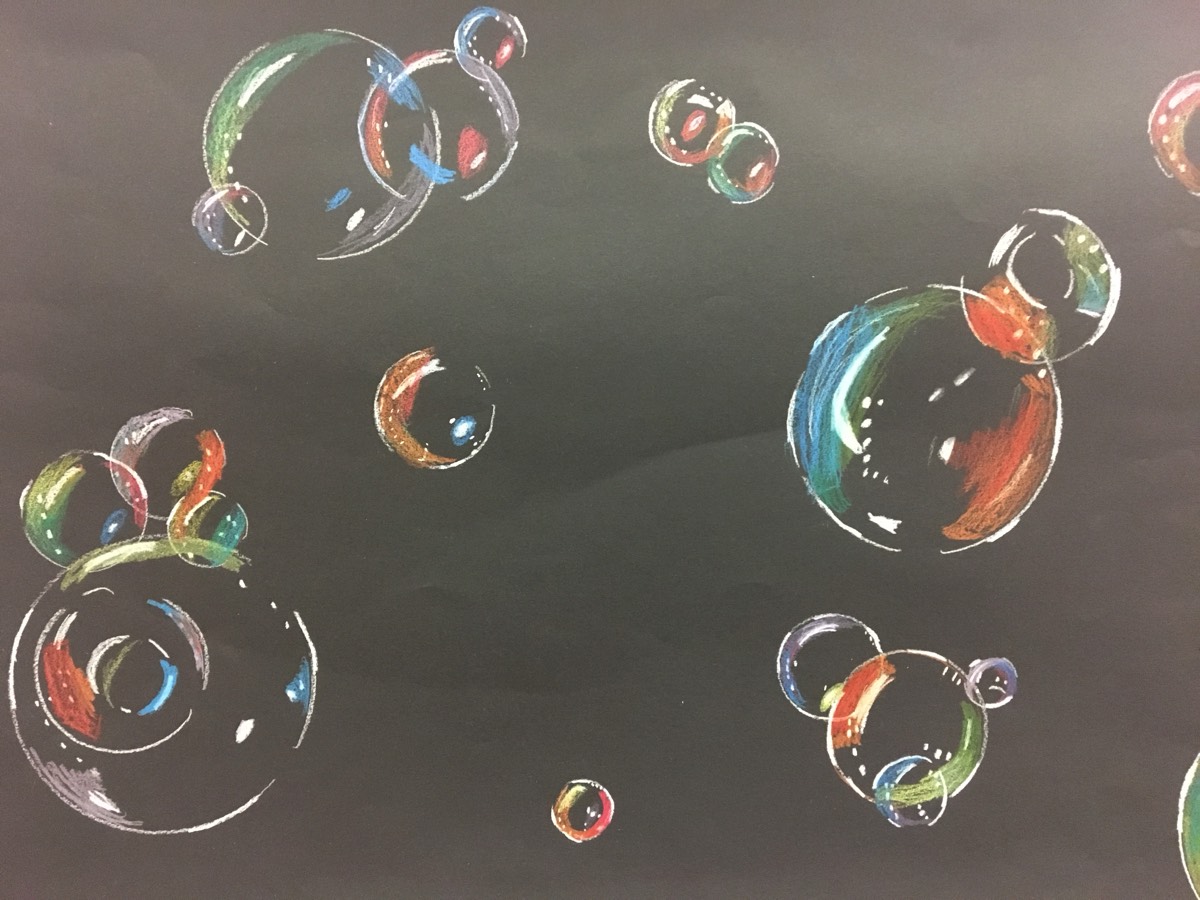
Examples
“Creativity takes courage.”
Cloverleaf Middle School
Follow Us
