Still Life Project
Techniques
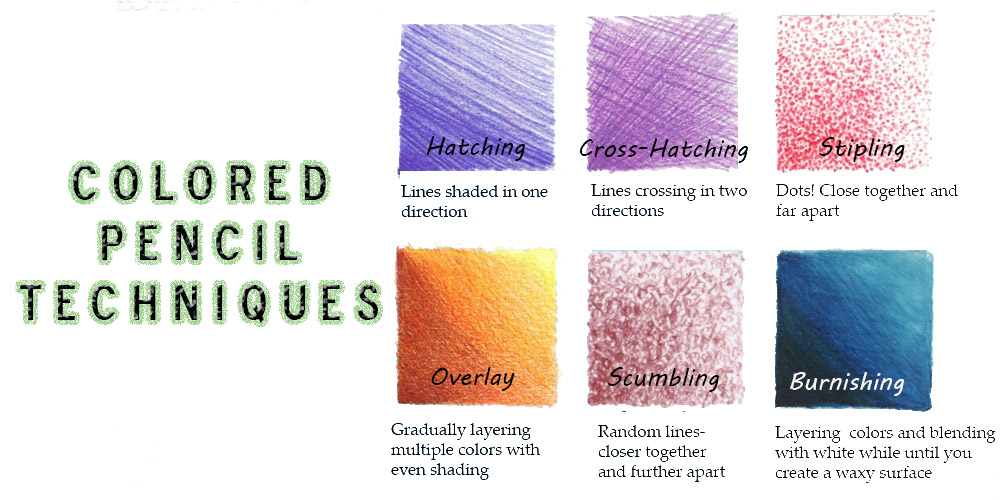
Color pencil techniques are methods and approaches used to create various effects and textures when working with colored pencils. Colored pencils are a versatile medium that can produce a wide range of artistic results, from smooth and blended gradients to textured and detailed renderings. Here are some common color pencil techniques:
Layering: Layering involves building up colors gradually by applying multiple layers of pencil strokes. This technique helps create vibrant and rich colors. Start with a light layer and gradually add more layers to achieve the desired intensity.
Burnishing: Burnishing involves applying heavy pressure to colored pencils to smooth out the texture of the paper and blend the colors together. This creates a smooth, polished appearance. You can use a white or colorless blender pencil to achieve this effect.
Blending: Blending colors together can be achieved using several methods:
- Color Pencil Blender: This is a pencil specifically designed to blend colors. It contains no pigment and helps soften edges and transitions.
- Solvent Blending: Using a solvent such as odorless mineral spirits or rubbing alcohol, you can blend and liquefy the pigment, creating a more painterly effect.
- Layering and Pressure: Simply layering colors and applying different levels of pressure can create smooth transitions between colors.
Scumbling: This involves using light, scribbled strokes to layer colors on top of each other. This technique creates a textured and slightly hazy effect, which can be great for rendering natural textures like foliage or clouds.
Hatching: This technique involves creating a series of parallel lines or strokes in one direction and then layering another set of lines in a different direction on top. This creates a mesh-like pattern and can add texture to your artwork.
Sgraffito: With this technique, you apply a layer of one color and then scratch through it using a pointed tool or the tip of a pencil to reveal the color underneath. This can add interesting texture and detail to your artwork.
Feathering: Using light strokes and gradually increasing pressure, you can create a feather-like texture that's great for depicting fur, feathers, or other fine textures.
Highlighting: Leave areas of the paper untouched or use a white pencil to add highlights and reflections. This can add dimension and luminosity to your artwork.
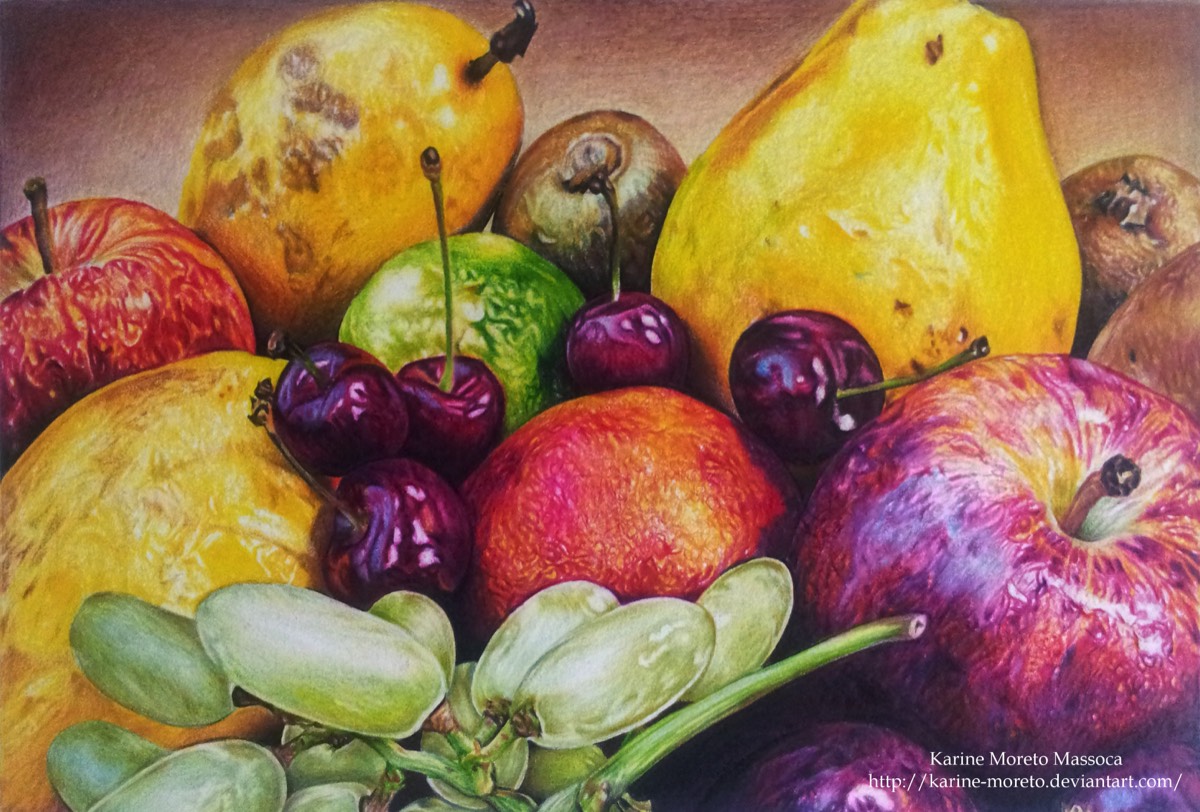
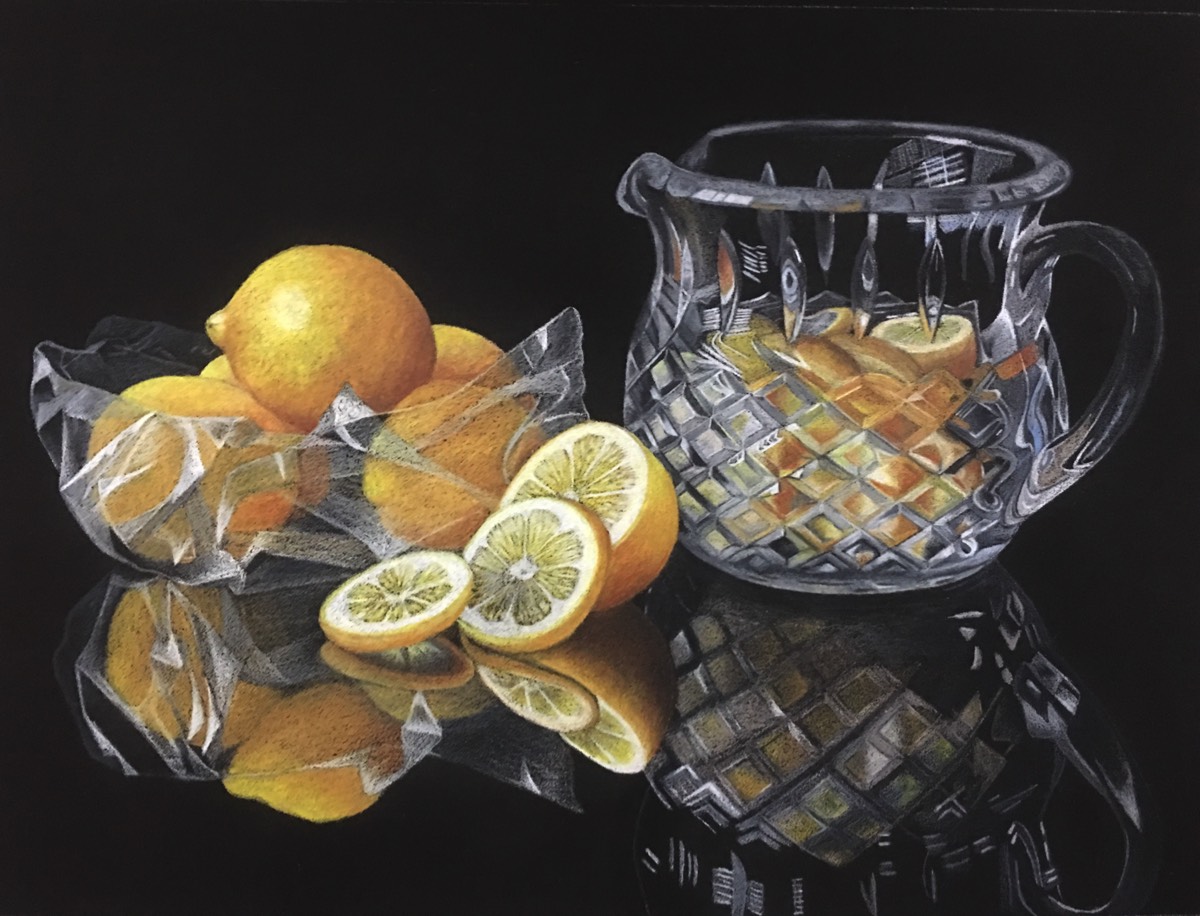
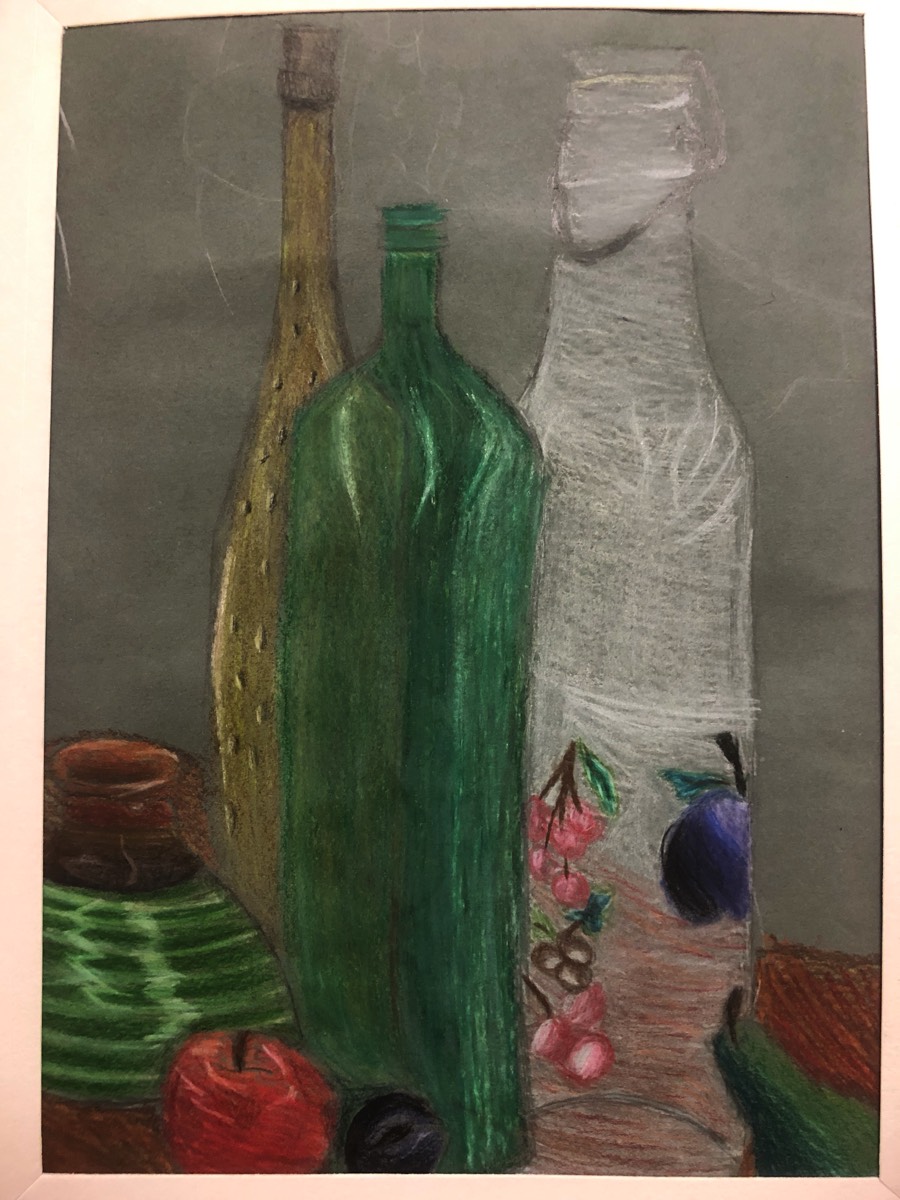
Project Example
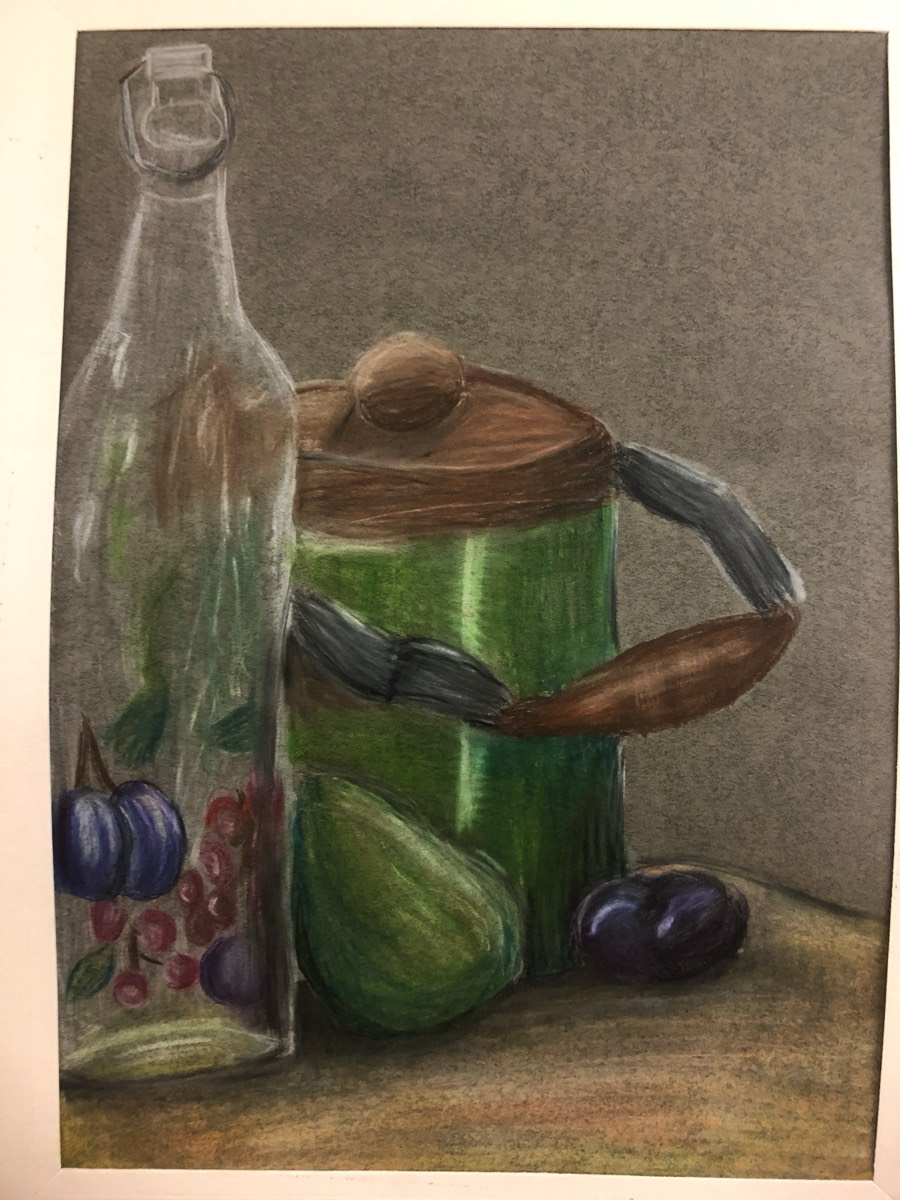
Student Work

Project Submission
Still Life Comments
- 1
- 2
- 3
- 4
- 5
- 6